In drum brakes, the shoe must contact the brake wheel evenly. If it tilts, only one edge touches. This creates “tapered wear,” reduces torque, and causes chatter. To prevent this, modern industrial drum brakes (like our YWZ13 series) use an Auto-Aligning Device (often called an “Equalization Link” or “Shoe Balancing Mechanism”).
However, many technicians ignore this device during shoe replacement or maintenance. A misadjusted auto-aligner is a leading cause of uneven lining wear and dragging brakes.
This article explains how the auto-aligning device works, how to check if it’s functioning, and the simple adjustment procedure to ensure your brake shoes wear flat and last longer.
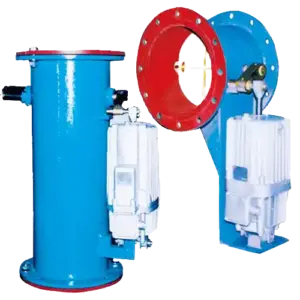
Close-up of YWZ13 brake shoe pivot showing the auto-aligning link/spring mechanism.
1) The Problem: Gravity vs. Geometry
A brake shoe is heavy. It hangs on a pivot pin. Without an aligning device, gravity pulls the bottom of the shoe inward (towards the wheel) and the top outward. When the brake releases, the top might clear the wheel, but the bottom drags. When it applies, the bottom hits first, creating a “toe-in” contact patch.
Consequences of No Auto-Aligning
- Uneven Wear: Lining wears out at one end while the other end is new.
- Dragging: The shoe rubs the wheel even when the thruster is fully extended.
- Chatter/Squeal: Uneven contact causes vibration during braking.
- Reduced Torque: Effective friction area is small until the lining wears down to match the wheel (which takes a long time).
2) How the Auto-Aligning Device Works
The device is usually a simple linkage or spring mechanism connecting the shoe to the brake arm. Its job is to keep the shoe parallel to the brake wheel surface throughout the opening and closing movement.
- Mechanism: It creates a slight friction or spring force that holds the shoe in its “last used” position relative to the arm, resisting gravity’s pull.
- Result: When the arm moves back, the shoe moves back parallel, maintaining an even air gap at top and bottom.
YWZ13 Series Electro-Hydraulic Drum Brake (Standard feature)
3) Checking Functionality (The “Wiggle Test”)
You can check the auto-aligner without tools:
- Release the Brake: Ensure the thruster is extended (brake open).
- Push the Shoe Top: Push the top of the shoe towards the wheel. Does it spring back or stay there?
- Push the Shoe Bottom: Push the bottom.
- Observation: The shoe should feel “floating” but stable. It should not flop loosely. If you align it manually to be parallel, it should stay parallel. If it immediately tilts bottom-in/top-out, the device is loose, broken, or missing.
4) Adjustment Procedure (Typical for YWZ Series)
Note: Always follow the specific manual for your brake model. This is a general guide for common linkage types.
Step 1: Inspect the Linkage
Check for bent rods, missing springs, or seized pivots. Clean off heavy grease/dust buildup.
Step 2: Set the Friction/Spring Tension
Most devices use a nut and spring washer (or friction disc) to create resistance at the shoe pivot.
- Tighten the Nut: Tighten until the shoe holds its position against gravity but can still be moved by hand force.
- Too Tight: The shoe won’t self-align to the wheel during braking. (It will wear unevenly in a fixed position).
- Too Loose: Gravity wins; the shoe tilts and drags.
Step 3: Verify Parallel Gap
With the brake released, measure the air gap at the top and bottom of the shoe lining.
- Target: The gap should be equal (e.g., 1.0 mm top, 1.0 mm bottom).
- Tolerance: A difference of < 0.5 mm is usually acceptable. > 1.0 mm difference requires adjustment.
5) Common Mistakes and Fixes
| Mistake | Symptom | Fix |
|---|---|---|
| Ignoring the Device | Shoe drags at bottom; lining wears wedge-shaped. | Adjust tension nut during every shoe change. |
| Over-Tightening | Shoe wears at top or bottom only (fixed tilt). | Loosen nut slightly; ensure shoe can pivot with firm hand pressure. |
| Greasing the Friction Disc | Shoe flops loose (no friction holding). | Clean the friction surfaces (they need friction to work!). Grease only the pin, not the friction clamp. |
| Missing Parts | Shoe tilts uncontrollably. | Replace the auto-aligning linkage kit. (Do not run without it). |
6) Why YWZ13 Brakes Are Better Here
Older brake designs (like YWZ3 or YWZ4) often lacked robust auto-aligning features or used simple springs that fatigued easily. The YWZ13 series uses a more reliable linkage design that maintains shoe parallelism even as linings wear. This is a key reason why YWZ13 linings typically last 20–30% longer in the same application.
Need help with uneven lining wear?
If your brake shoes are wearing unevenly despite adjustment, the auto-aligning mechanism might be worn out or damaged. We supply repair kits (linkages, springs, friction discs) for YWZ series brakes to restore proper shoe geometry.