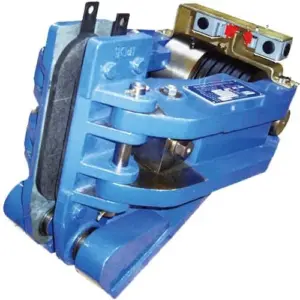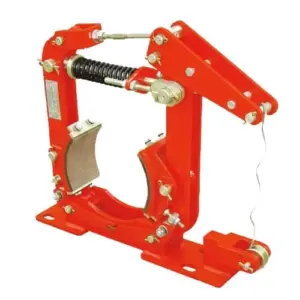
When an industrial brake fails, the clock starts ticking. Every minute of downtime costs money, and more importantly, an underperforming brake poses a significant safety risk. Troubleshooting can be stressful, but a systematic approach can quickly lead you to the root cause.
This guide provides a logical flowchart to help you diagnose the most common industrial brake problems. Start by identifying your primary symptom, then follow the chart to pinpoint potential causes and find actionable solutions. For more detail on each step, refer to the expanded explanations below the chart.
Safety First: Before beginning any inspection or maintenance, ensure the equipment is properly locked out and tagged out (LOTO). If you are ever unsure, stop and consult a qualified technician.
The Troubleshooting Flowchart
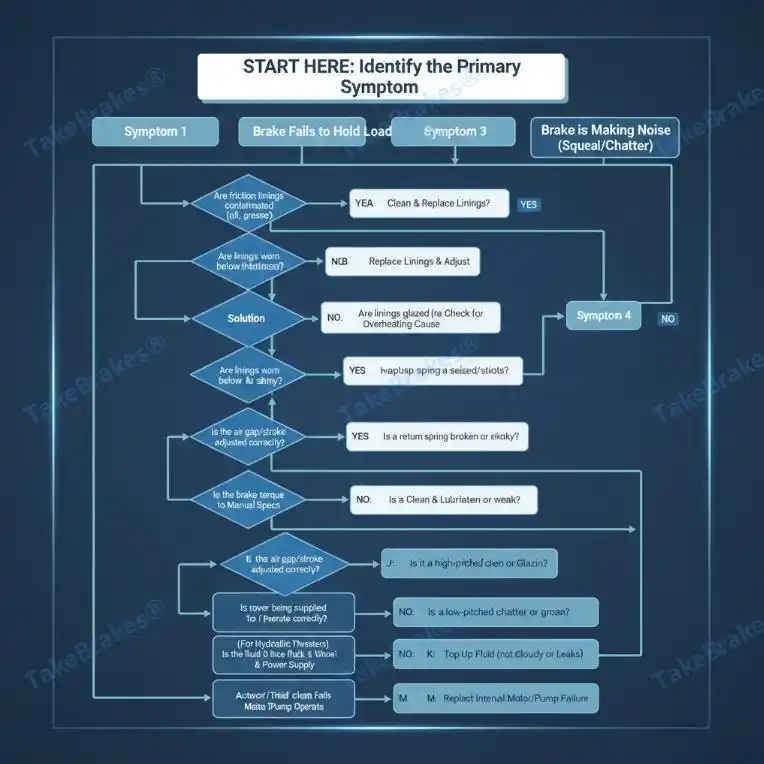
(Text Version of Flowchart)
START HERE: Identify the Primary Symptom
- Symptom 1: Brake Fails to Hold Load (Slipping)
->Are friction linings contaminated (oil, grease)?- YES:
=>Solution A: Clean & Replace Linings - NO:
->Are linings worn below minimum thickness?- YES:
=>Solution B: Replace Linings & Adjust - NO:
->Are linings glazed (hard & shiny)?- YES:
=>Solution C: Replace Linings & Check for Overheating Cause - NO:
->Is the brake torque set correctly?- NO:
=>Solution D: Adjust Spring Torque
- NO:
- YES:
- YES:
- YES:
- Symptom 2: Brake Fails to Release (Dragging)
->Does the actuator/thruster operate correctly?- NO:
=>Go to Symptom 4 - YES:
->Is the air gap/stroke adjusted correctly?- NO:
=>Solution E: Readjust Brake to Manual Specs - YES:
->Are pivot pins or linkages seized/sticky?- YES:
=>Solution F: Clean & Lubricate Pivots - NO:
->Is a return spring broken or weak?- YES:
=>Solution G: Replace Spring
- YES:
- YES:
- NO:
- NO:
- Symptom 3: Brake is Making Noise (Squeal/Chatter)
->Is it a high-pitched squeal?- YES:
=>Solution H: Check for Vibration or Glazing - NO:
->Is it a low-pitched chatter or groan?- YES:
=>Solution I: Check for Contamination or Loose Parts
- YES:
- YES:
- Symptom 4: Actuator / Thruster Fails to Operate
->Is power being supplied to the actuator?- NO:
=>Solution J: Check Fuses, Wiring, & Power Supply - YES:
->(For Hydraulic Thrusters) Is the fluid level correct?- NO:
=>Solution K: Top Up Fluid & Check for Leaks - YES:
->Is the fluid clean (not cloudy or dark)?- NO:
=>Solution L: Replace Hydraulic Fluid - YES:
=>Solution M: Suspect Internal Motor/Pump Failure
- NO:
- NO:
- NO:
Detailed Solutions & Explanations
Here is a more in-depth look at the solutions identified in the flowchart.
Problem: Brake is Slipping (Solutions A-D)
- Solution A: Clean & Replace Linings: Oil or grease contamination is a primary cause of slipping. You cannot simply clean the linings; the contaminants soak into the material. The only safe solution is to replace the
Brake Liningsand thoroughly degrease the brake disc or drum. Find and fix the source of the leak before reassembly. - Solution B: Replace Linings & Adjust: Friction material is a consumable. If it’s worn below the manufacturer’s specified minimum, it must be replaced. After installing new linings, you must readjust the brake according to the manual.
- Solution C: Replace Linings & Check for Overheating: Glazed linings are a sign of severe overheating. While you must replace the linings, it’s critical to find out why they overheated. Is the brake dragging? Is the duty cycle too high for the brake’s thermal capacity?
- Solution D: Adjust Spring Torque: The main spring provides the braking force. If it has been improperly adjusted or has weakened over time, the brake won’t produce its rated torque. Use a torque wrench to set it according to the manufacturer’s specifications.
Problem: Brake is Dragging (Solutions E-G)
- Solution E: Readjust Brake: The most common cause of dragging is an incorrect air gap or stroke setting. Refer to your brake’s manual (or our
Maintenance Checklist Blog Post) and carefully readjust the linkage. - Solution F: Clean & Lubricate Pivots: Dirt, rust, and old grease can cause pivot pins to seize, preventing the brake from opening fully. Disassemble the affected linkages, clean all components, and lubricate with the recommended high-pressure grease.
- Solution G: Replace Spring: Return springs help ensure the brake opens quickly and fully. If one is broken or has lost its tension, the brake may not retract properly.
Problem: Brake is Noisy (Solutions H-I)
- Solution H: Check for Vibration or Glazing: A high-pitched squeal is a high-frequency vibration. It can be caused by glazed linings, improper alignment, or vibration from other parts of the machine.
- Solution I: Check for Contamination or Loose Parts: A low-pitched chatter or groan often points to contamination on the friction surfaces or loose mounting bolts that allow the entire brake assembly to vibrate.
Problem: Actuator/Thruster Fails (Solutions J-M)
- Solution J: Check Fuses, Wiring, & Power Supply: Start with the basics. Use a multimeter to confirm that the correct voltage is reaching the actuator’s terminals. Check for blown fuses, tripped breakers, or damaged wiring.
- Solution K: Top Up Fluid & Check for Leaks: A low fluid level is the most common issue with
Electro-Hydraulic Thrusters. Top up with the correct fluid type and carefully inspect the entire unit for the source of the leak. - Solution L: Replace Hydraulic Fluid: Cloudy or milky fluid indicates water contamination, which will cause poor performance and internal corrosion. Dark, thick fluid is degraded and has lost its properties. Drain, flush, and refill the system.
- Solution M: Suspect Internal Failure: If power and fluid are good, but the thruster still won’t operate, it likely has an internal failure of the motor or hydraulic pump. At this point, the unit will require repair or replacement.
When to Call an Expert
This flowchart covers the most common issues, but some problems require specialized tools and expertise. If you’ve gone through the chart and still can’t resolve the issue, or if you find cracks in the brake’s structural components, it’s time to stop.
For complex diagnostics, major repairs, or selecting a replacement brake, contact our technical support team. Your safety is our priority.