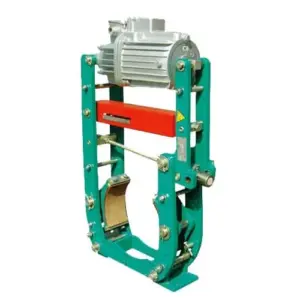
A properly adjusted YWZ series electro-hydraulic drum brake is a safe and efficient brake. One of the most critical maintenance tasks is adjusting the “clearance” (also known as “退距” or pad-to-drum gap). This simple procedure ensures your brake responds quickly without dragging, extending the life of your brake shoes and saving energy.
If the clearance is too large, the brake’s response time will be slow. If it’s too small, the brake shoes will drag against the drum, causing premature wear and overheating.
This practical guide will walk you through the correct, step-by-step process for adjusting the clearance on your YWZ, YWZ3B, YWZ4, and similar series drum brakes.
Safety First: Before beginning any maintenance, ensure the equipment is locked out and tagged out (LOTO) according to your facility’s safety procedures. Ensure the brake is de-energized and in its applied (braked) state.
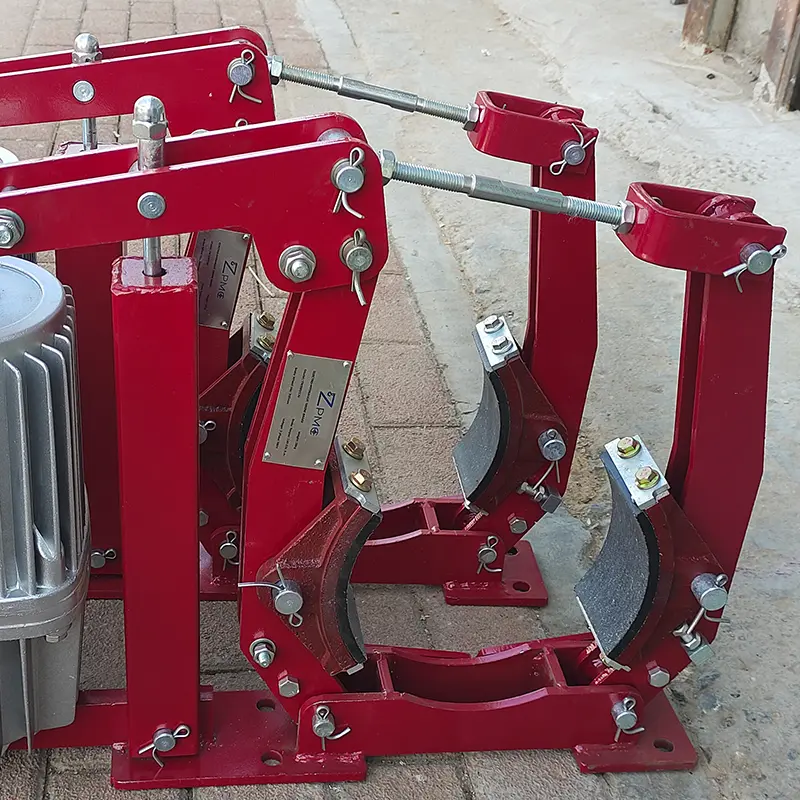
Understanding the Key Adjustment Point
The clearance adjustment is made to ensure both brake shoes move away from the brake drum by an equal amount when the thruster is energized.
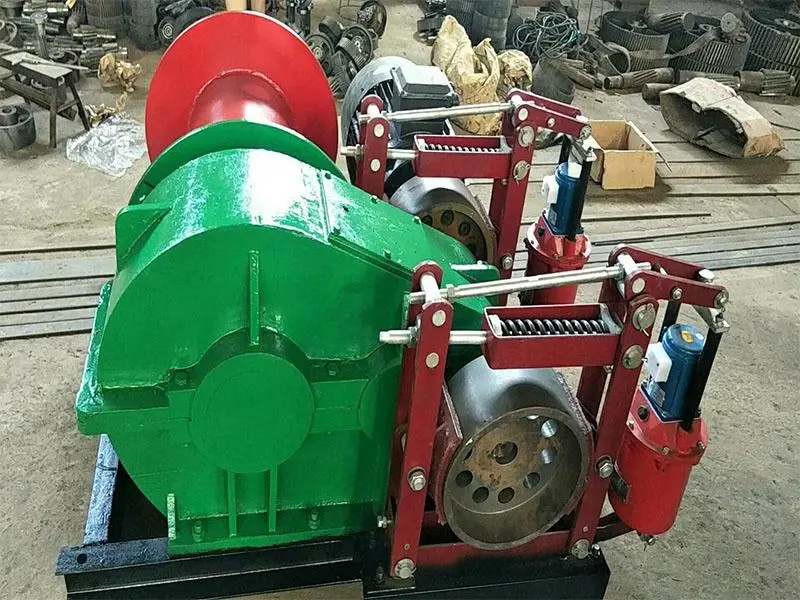
Look for a long, horizontal bolt located near the base of the brake, connecting the two main brake arms. This is the Clearance Equalizing Link / Adjustment Bolt. This is the only part you need to adjust for clearance.
IMPORTANT: Do not confuse this with the main vertical spring that controls the braking torque. We are not adjusting the braking force, only the pad gap.
The Step-by-Step Adjustment Procedure
Step 1: Loosen the Lock Nuts
The adjustment bolt has a lock nut (or two) on either side to prevent it from vibrating loose. Using two wrenches, hold the bolt steady and loosen these lock nuts. You only need to loosen them enough to allow the main bolt to turn freely.
Step 2: Power On the Brake to Release It
Temporarily energize the brake so that the electro-hydraulic thruster (like our Ed Series Thruster) fully activates. This will lift the brake arms and pull the shoes away from the drum, revealing the current clearance.
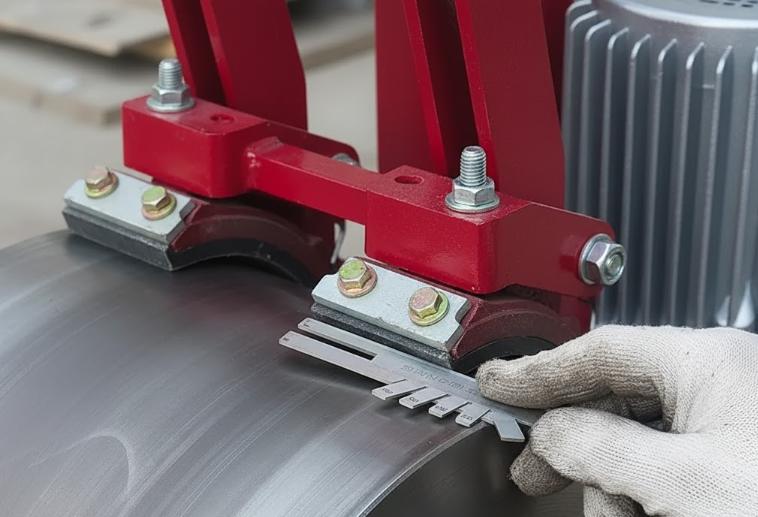
Step 3: Measure the Clearance
With the brake released, use a set of feeler gauges to measure the gap between the brake shoe lining and the brake drum on both the left and right sides. The goal is to have an equal gap on both sides. The ideal gap size can vary depending on the brake’s diameter, but a common range is 0.5mm to 1.0mm. Refer to your specific brake’s manual for the exact recommended value.
You will likely find that one side has a larger gap than the other.
Step 4: Adjust the Bolt to Equalize the Gaps
This is the key step. While the brake is still energized and released:
- To increase the gap on the RIGHT side (and decrease it on the left), turn the adjustment bolt clockwise.
- To increase the gap on the LEFT side (and decrease it on the right), turn the adjustment bolt counter-clockwise.
Make small, incremental turns (e.g., a quarter-turn at a time) and re-measure the gaps on both sides after each adjustment. Continue until the clearance is equal on both the left and right shoes.
Step 5: Verify Operation
Once the gaps are equal, de-energize and re-energize the brake several times. Watch the brake arms and shoes. They should move smoothly and symmetrically. Visually confirm that the clearance on both sides remains equal during operation.
H3: Step 6: Tighten the Lock Nuts
With the adjustment perfected, de-energize the brake one last time. Now, securely tighten the lock nuts you loosened in Step 1. Use two wrenches again to ensure the adjustment bolt does not turn while you tighten the nuts. This is crucial to maintain your setting.
How Often Should You Adjust Clearance?
Brake shoe clearance should be checked as part of your regular preventative maintenance schedule. As the brake shoe linings wear down, the clearance will naturally increase. A good rule of thumb is to check and adjust the clearance every time you perform routine lubrication, or if you notice a delay in the brake’s response time.
By mastering this simple adjustment, you ensure your brake operates at peak performance, enhancing both the safety and reliability of your equipment.