An industrial brake is not smart—it opens and closes based on physics. To make it part of an automated system (PLC), you need eyes on it. That’s the job of limit switches. They tell the crane control system “I am open, safe to lift” or “I am closed, motor off.”
However, limit switches are the #1 cause of nuisance faults in brake systems. A loose bracket or a wrong wiring logic can stop a critical production line. This article explains the three main switch types—Brake Open, Brake Closed, and Lining Wear—and how to install and adjust them correctly on YWZ13 drum brakes and SH disc brakes.
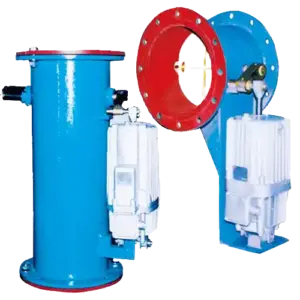
Diagram showing switch locations: (A) Thruster push-rod (Open/Closed), (B) Brake shoe pivot (Wear).
1) Why Switches Matter: The “Interlock” Safety Chain
Switches aren’t just for lights; they prevent expensive damage:
- Motor Burnout Protection: The “Brake Open” switch prevents the motor from driving against a closed brake.
- Load Drop Prevention: The “Brake Closed” switch confirms the brake has gripped before the drive releases torque (torque proving).
- Disc/Drum Protection: The “Wear” switch stops the machine before rivets/backing plates score the friction surface.
2) Switch 1: Brake Open (Release) Signal
Function: Confirms the brake mechanism has fully released (shoes/pads are clear of the wheel).
Installation Location
- Drum Brakes (YWZ): Usually mounted on the thruster. It detects when the thruster push-rod has extended to its working stroke.
- Disc Brakes (SH): Mounted on the caliper arm or hydraulic cylinder. Detects piston retraction.
Common Mistake
Setting the switch too “early.” If the switch triggers when the brake is only 50% open, the motor might start while the pads are still dragging. Adjustment Tip: Set the switch to trigger only when the brake is >90% released.
3) Switch 2: Brake Closed (Set) Signal
Function: Confirms the brake has applied torque (springs have decompressed).
Critical Use Case: In hoisting, this signal is often used for “Torque Proving.” The drive holds the load at zero speed, commands the brake to close, and waits for this switch before cutting motor power. If the switch doesn’t trigger (brake jammed open), the drive keeps holding the load to prevent a drop.
4) Switch 3: Lining Wear (Limit) Signal
Function: Triggers when the friction material has worn down to the replacement limit.
Mecanismo
As linings wear, the brake linkages (arms) move further inward to contact the wheel. The wear switch detects this extra travel distance.
- Lógica: Usually wired as “Normally Closed” (NC). When wear limit is reached, the cam hits the switch, opens the circuit, and triggers a maintenance alarm.
- Ajuste: Must be set before the rivets touch the wheel (e.g., at 2mm remaining thickness).
5) Mechanical Lever vs. Inductive Proximity Switches
| Tipo | Pros | Cons | Mejor para |
|---|---|---|---|
| Mechanical (Lever/Roller) | Simple, cheap, visible action, no power supply needed for switch itself. | Moving parts wear out; sensitive to dust/ice sticking; lever can bend. | General indoor applications; “Wear” signals. |
| Inductive Proximity (Sensor) | No contact (no wear), sealed (IP67), resistant to vibration/dirt. | Requires power wiring; harder to troubleshoot visually (needs LED check). | High-cycle cranes, outdoor/port environments, dusty areas. |
Recommendation: For heavy-duty ports or outdoor conveyors, specify Inductive Proximity Switches. They eliminate the “bent lever” failures common with mechanical switches.
6) Wiring Logic: N.O. vs. N.C. for Safety
In safety circuits, wire breakage should trigger a fault (Safe State), not silence.
- Standard Practice: Use Normally Closed (N.C.) contacts for the safety loop.
- Scenario: If a wire is cut or a terminal vibrates loose, the circuit opens, the PLC sees “Fault,” and the machine stops safely. If you used N.O., a cut wire would look like “Everything is fine” until the brake failed.
7) Troubleshooting Nuisance Faults
If your PLC keeps reporting “Brake Fault” but the brake seems fine:
- Check Bracket Stiffness: Is the switch mounting bracket vibrating? Thin brackets flap during braking shocks, causing momentary signal loss (“chatter”).
- Check Target Alignment: For proximity sensors, is the target metal (cam/flag) passing within the sensing range (usually 2–5mm)?
- Check Hysteresis: Mechanical switches have a “reset” travel. If the brake linkage has play/slop, it might sit right on the switch’s trigger point, flickering On/Off. Tighten the linkage pins.
Need switches added to your existing brakes?
Most YWZ and SH brakes have pre-drilled mounting points for switches. We supply retrofit switch kits (brackets + cam + switch) that bolt onto standard models. Specify your brake model and voltage (e.g., 220VAC or 24VDC) for a quote.
Contact us for brake switch retrofit kits.